
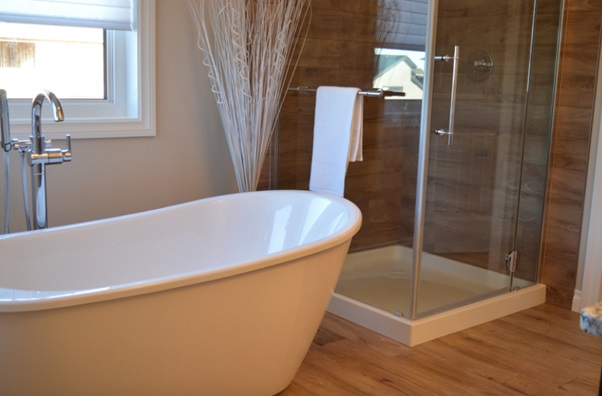
More and more homeowners are starting to embrace showers over tubs. Showers tend to bring benefits that tubs just don’t have. They conserve space, which serves smaller bathrooms rather well.
Other homeowners favor showers because they spend less time there than in tubs. For millennials, this utility and the style showers bring are key features.
Whatever your reasons are for replacing your tub, here’s a look at how to replace a tub with a shower.
Step 1: Turn off the Water
The first step to replacing your tub is turning the water off. Any home project that involves a water appliance requires this first step.
Locate the shutoff valve connected to your tub and turn the knob until you can’t anymore. This turns off the water running directly to your bathroom.
Some bathrooms may not have a designated shutoff valve. In this case, you can shut off all water running to the entire house.
Be sure to test that the water is off before you start your project. Simply turn on the bathtub’s faucet to see if the water still runs. You can also check the water pressure in the other valves to be extra sure.
Step 2: Remove the Overflow Covering and Drain Flange
For the second step, you’ll need to remove the tub plumbing parts.
Locate the drain flange on the bottom of your tub and use a tub drain wrench to disconnect it. If you can’t locate the drain flange, it may be covered by your drain stopper. In this case, you can unscrew the stopper and then remove the flange.
Then, use a screwdriver to remove the overflow valve cover. Finally, remove the tub spout mounted on the wall. You can either loosen the screws on the spout with a screwdriver or twist the spout off if there are no screws.
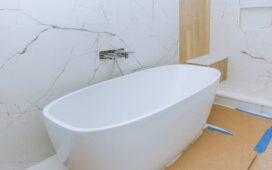
Step 3: Disconnect the Tub from the Wall
Before you install a new shower, you’ll need to remove the tub from the roots. For this step, you’ll need to remove the tub from the studs from the connecting wall.
These studs are connected to a flange secured to this wall. It’s important to note that you may need wall repair when you replace your tub. In order to disconnect the tub, you’ll need to cut into the connected wall.
You’ll also need to remove about 6 inches of the wall around the tub. Measure out or estimate approximately 6 inches above the tub.
Then do this for the right and left sides of the tub. If you have a tile wall, you’ll need a grout remover and a putty knife. Cut along the lines of grout and then remove each tile.
When you’ve removed the outer layer of the wall, you can start cutting into the drywall. Be sure to use a drywall saw for this step, and start cutting along your 6-inch marks. Go as far as you can until you reach the studs.
Finally, remove any caulking on the sides of your tub with the putty knife and start pulling the tub from the wall.
Removing the tub is a two-person job. So get help before trying to lift it.
Step 4: Remove and Replace the Tub with the Shower
You may need to cut your tub into smaller pieces to manage its size and weight. Breaking the tub into manageable pieces makes it easier to transport and dispose of. Different types of materials call for different methods of disposal.
Some materials like porcelain tubs should be left whole when they’re disposed of. Tubs made of lightweight materials are also removable without breaking them up.
If you have a cast iron tub you can use your sledgehammer to break it up. You should use a reciprocating saw for tubs composed of fiberglass or steel.
Connect the rest of the pipes in the drain assembly. Make sure they’re secure but not too tight.
Step 5: Install the Base of the Shower Stall
Position the shower base inside the alcove and make sure it aligns with the drain. Caulk the space between the shower pan and the drain with silicone caulk. You can also caulk the edge of the shower base on the bottom of the flange.
After caulking, screw the drain flange into the drain and install the strainer. The caulking holds the base in place, but it still needs to be nailed in to hold securely.
You can drill pilot holes in the flange and insert roofing nails. Do this until you’ve drilled into the studs surrounding the shower alcove.
Step 6: Install Vapor Barrier, Backer Board, and Stall Panels
A vapor barrier is a layer of insulation that prevents rotting from excess water in your shower. The wood studs behind your shower wall are vulnerable to water damage and rotting.
Adding a layer of vapor protection preserves these studs by sealing out water. You can roll the vapor barrier out directly onto your drywall. You can tape the vapor barrier down to make it taught and secure.
Next, you can install your backer board over your vapor barrier. Backer boards come in sheets so can drill sections into your studs one by one.
Simply line them up over the bottom of your shower base and start drilling them into the studs. You can then drill the side of the shower panels into the studs.
Some showers have surrounding tile rather than water-resistant side panels. If you’re going to install tiles make sure the surface is dry for optimal results.
Moisture can make the structure unstable. Any excess water in the installation may damage the framing on your shower.
Showers models such as a solid surface shower allow you to incorporate a touch of design. Other than tile, you can use sealed natural stone for water resistance and a refined look.
Step 7: Connect the Drain Assembly
For the last step, you’ll need to know a little bit about how to do plumbing for a shower. The basic parts involve the valve and the drain assembly.
Since you’re placing your tub with a shower, you’ll need a new valve. The shower valve diverts the water to the pipes connected to your shower, and then to your showerhead. There are different types of shower valves available:
- Anti-scald valves
- Mixer valves
- Thermostatic valves
- Transfer valves
Anti-scald valves are the most common shower valve model. True to their name, they prevent water from reaching extreme levels of heat. They balance the flow of hot and cold water. While this is a popular choice, you have other options.
These valves determine the flow of hot and cold water. Because of this, they’re closely related to the type of water heating system that you already have. Understanding the type of water system you have can help you choose the right valve.
Once you’ve made your decision, you can connect your drain pipes to the valve. After about a day of letting the pipes adjust, you can also turn the water on and start using your new shower.
Replace a Tub with a Shower DIY Style or Through a Service Provider
Ready to replace a tub with a shower now? This is a popular home project that you can do without calling a professional.
However, it also helps to get professional opinions about the types of shower models and parts available to you. The installation process also requires some precision. So be sure to get professional help if you need it.
If you’re looking for some more home improvement projects to tackle, check out more of our home improvement content!


